
Mold growth and development in the kitchen is a fairly common phenomenon. Daily cooking makes the kitchen the warmest and most moist room in the entire house.
Moreover, there exist plenty of water supply lines and other water-using appliances like a dishwasher or icemaker. Any fault on these tools or regular spilling during household activities can leak water and even cause floods. Poor ventilation and improper insulation also result in excessive humidity in your kitchen. All of these factors collectively contribute to mold growth and development. The kitchen mold is disgusting. Apart from basic hygiene, they have serious health issues. You need to get your kitchen rid of mold upbringing ASAP.
If you know the basics of mold cleaning, it’s not such a tough task at all. Here you’ll find the detailed guidelines of the entire mold removal procedure in your kitchen. Thank me later!

Table of Contents
How to find mold in a kitchen?
In your kitchen, mold can also grow at any place where their spores can land and eventually find an optimal moisturized condition. So, any damp place of your home is at risk. Is there any musty odor inside your kitchen? That’s possibly due to kitchen mold.
Mold or Dirt?
Don’t confuse yourself between mildewed or dirty surfaces. There’s an effortless technique to distinguish between the two. You just need to have household bleach, like Clorox. Dab a few drops on the damp blackened area and see if the layer gets lightened or not after one or two minutes. If it does so, then it’s mildew. Otherwise, that’s dirt.
Check for mold exposure signs& symptoms
Symptoms like musty mold odor, water sprout, discoloring of wall, ceiling or roof surface, visible mold growing like tiny black spots or colored threaded ones, etc. are possible due to mold outbreak. Apart from those, you may also feel some intense allergic symptoms like runny nose, scratchy eyes, sneezing, blocked nasal due to mold issues.
Use a screwdriver or any sharp object to probe the suspected area
If you can find the suspected mildewed or molded area, then examine it with a screwdriver or similarly sharp tool for mold testing. If you find the surface being soft or getting crumbled, mold has taken place and started rotting. Take necessary action ASAP.
Check for any plumbing or outside leaks
If there are any leaks in the kitchen’s waterline, waste pipe, or any other plumbing areas, there’s a chance of molds feeding off around there. In case of the kitchen wall or ceiling, look for the leaks and test for molds nearby. The wooden surface of decks, roof flashing, window wells, or any nearby vents needs a close inspection for mold testing.
Examine the ductwork
If there’s no sign of any roof leakage, it’s the poor insulation of the ductwork for which mold can grow on the kitchen’s ceiling underneath the ducts. Because of the condensation process by moist air, water is produced outside the cold air duct when the duct is poorly insulated. Due to this, mold spores can develop. So, check the ductwork for mold expansion.
Test the mold
There are professionals for mold testing and inspection. But, it’s unnecessary to have routine mold sampling or testing for your kitchen, as you intend to remove them anyway. In case you’re interested, there’s a DIY home mold test kit available from $8 to $40. There’re also mold mitigation professionals who offer thorough mold inspection of your house.
Most common places for Kitchen Mold
Kitchen Drain
The most favorable place for mold development is your kitchen drain. Leaking sink drain offers the best environment for mold upbringing due to its high humidity.
Kitchen Spoon
If you use a wooden spoon and after washing them keep in any utensil drawer, mold may grow on them though there’s no damp condition. It’s because the dormant mold spores start springing to life on either the spoon or the drawer.
Kitchen Sink
There exist different water sources in the sink, including both hot and cold-water supply lines and tubes. Tiny and slow leaks on the sink pipes can go unattended for months, resulting in a black mold under your kitchen sink. The silicon sink caulk around your kitchen sink is very susceptible to mold due to the moisture it holds. Inadequate ventilation helps mold grow on the sink cupboard or the wooden surface beneath the kitchen sink. Another tricky place is your sink sprayer. Mold can grow on the sprayer hose, handle, or nozzles. Mold contamination can cause a musty odor in the water. So, you need to be careful about that too.
Cabinet
If your kitchen cabinet gets moist and this dampness lingers, then mold can develop on the cabinet walls. Kitchen sink leakage or any other faulty plumbing issues are conducive to mold growth in the cabinet and also the back of it. Dampness and elevated humidity cause mold breeds under the cabinet as well.
Kitchen Towels
Mold spores are everywhere, and your damp kitchen towels give them the perfect atmosphere of upbringing. Mold is capable of breaking the cotton of the towels.
Floor
No matter if you have a concrete kitchen floor or a wooden one, mold is a pretty common occurrence due to water slipping, flooding, leaky roof, or faulty plumbing. In the case of ceramic tiles of the floor, mold stains look miserable, especially the black coating on the edges.
Faucet
Mold can start producing inside your dysfunctional kitchen faucet. You’ll notice the strings or chunks of them in the water. It’s such an unpleasant surprise, isn’t it?
Compost Bin
Any rotten substances, especially like rotten vegetables or fruits, are the perfect place for any fungal growth to occur. Thus, compost bins are at risk for mold development if the rotting items aren’t timely taken out.
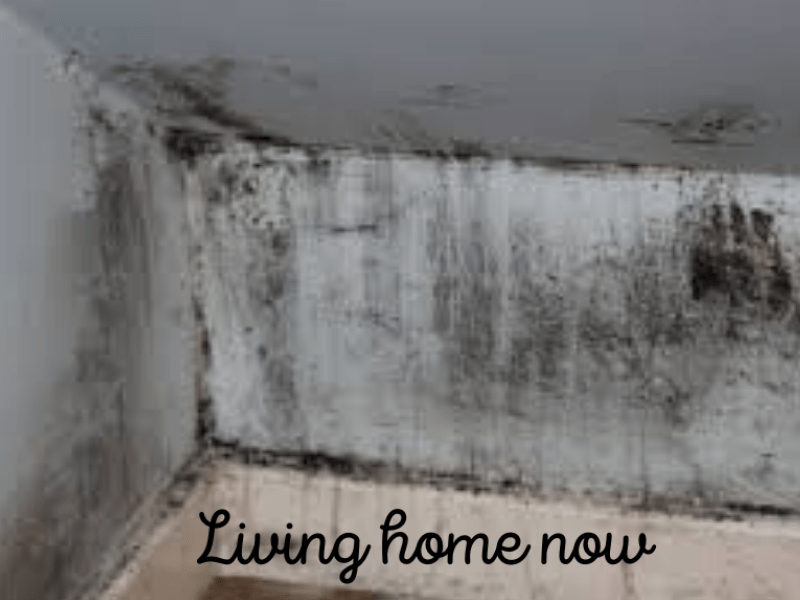
Kitchen Ceiling
Inadequate insulation and excess humidity can initiate mold growth on the kitchen ceiling. Mold formation due to roof leakage will be confined to a single region, disbursed in a circular pattern, and typically yellow or brown. You may see a stain forming in a straight line. Don’t get confused; it’s ghosting, not mold.
Cutting Board
If you don’t wash your cutting boards regularly using vinegar, fungi may form on them along with mold and mildew.
HVAC Unit
A relatively warmer spot with intense water vapor makes your kitchen HVAC ducts certainly prone to mold buildup. When the cold air passes through the duct, water vapor forms within the unit. It’s the ideal environment for mold colonies development.
Refrigerator
Because of pretty much similar reasons to HVAC units, mold also forms in and outside of the kitchen refrigerator. Moreover, old leftover foods make it even more suitable for the fungal clusters.
How to Get Rid of Kitchen Mold?
If you know some basic techniques, you’ll complete this task as one of your DIY projects. First, you need to know the basic mold removal techniques.
There’re multiple different options you may proceed for killing the kitchen mold.
Killing kitchen mold with Ammonia
Ammonia is an excellent disinfectant for killing mold on any hard and non-porous surfaces like your kitchen. It’s cost-effective and easy to find at any local grocery shop or hardware store. The fume of ammonia is toxic and sensitive for your eye, skin, and breath. So before using ammonia for mold mitigation, always wear a respirator and put gloves on hands as safety measures.
- Make a combination of ammonia and water with a 1:1 ratio.
- Take a clean spray bottle and pour the solution into it.
- Be careful so that the spray bottle doesn’t have any other chlorinated solution into it. Ammonia reacts vigorously with such a solution and is risky for you.
- Start spraying on the moldy spots and wait for 5 to 10 minutes after that.
- Scrub the areas with brush and wipe them clean.
- Repeat the process a few times.
Limitations
Ammonia isn’t an excellent mold killing substance for porous materials like wood, particleboard, or drywall. Once you clean your kitchen with ammonia, it’ll remain stain-free for a few weeks, then again, and mold will start growing!
Cleaning your kitchen with Bleach
Chlorinated bleach contains Sodium Hypochlorite and is capable of killing almost all known species of molds on non-porous surfaces like tiles, concrete, ceramic, or glass. Cleaning mold with Bleach is such an easy process to follow.
- Wear a proper N95 respirator mask and hand gloves as bleach produces harsh fumes of Chlorine gas, which can cause breathing issues, and attack your eye or skin.
- Add 1 cup of bleach to around 1-gallon amount of water (the approximate ratio of 1 to 10).
- Put the solution into a bottle and spray on the mold stained spots.
- Use a sponge or soft disposable cloth to wipe the solution around the entire area.
- Don’t rinse off the area afterward, as bleach requires some time to continue its disinfection process. Keep the foods, vegetables away, and don’t let your children touch the blech.
- Never mix bleach with vinegar or ammonia. In both cases, extremely toxic chlorine gas will produce, and its fume can cause extreme damage to your eyes, skin, nose, and lungs.
Limitations
The chlorine present in bleach can’t penetrate through their surface, and only water is absorbed. Thus, it provides a more moist condition for the molds to feed themselves further on.
Kitchen mold removal using vinegar
Vinegar is a mild acid, non-toxic, natural, and safe. It’s inexpensive as well. It’s the best option for killing molds in your kitchen sinks and cabinets. To kill mold with vinegar, you need to:
- Pour some white distilled vinegar into a spray bottle first. No need to add water into it.
- Spray vinegar on the mold stains. Be careful so that no portion gets missed spraying.
- Keep the surface open and wait for an hour.
- Get the surface wiped clean by water or any damp towel.
Limitations
You may feel a bit of discomfort because of the vinegar’s aroma. But, it’s just a matter of a few hours, and then it’ll be gone.
Using Hydrogen Peroxide as a mold cleaning agent
Hydrogen Peroxide is anti-fungal, anti-bacterial, and anti-viral. It’s better than bleach or ammonia, as it’s well-applicable for porous and non-porous materials. The process of killing kitchen mold with Hydrogen Peroxide also fades the mold stains away.
- Use 3% concentrated hydrogen peroxide for the mold killing process.
- Pour 1 part of the reagent with 2 parts of water into a spray bottle and make the solution.
- Spray on the moldy surface thoroughly and evenly.
- Leave the surface unattended for 10 minutes.
- After that, use a brush to scrub the surface and remove the mold stains lightly.
- Wipe away the entire surface and dry it.
Mold removal using baking soda
Baking soda is considered as a natural mold cleaning object. It also deodorizes and helps in getting rid of the moldy, musty smell from your kitchen.
- Mix a small amount of baking soda with a bottle of water to make the solution. A quarter tablespoon will be perfect for this.
- Now spray the solution on the suspected moldy area.
- Use a soft scrubbing brush or a sponge to rub the surface and remove all the mold from it.
- Cleanse the surface with water so that the residue can be washed out.
Mold mitigation by Borax
Borax is a well-known herbicide/insecticide, but it doesn’t emit any harmful fume or chemical. You can make a Borax solution for this cleaning purpose by following further steps.
- In a gallon of water, pour 1 cup of Borax to make the solution.
- Spray the solution and scrub the surface using a brush.
- Don’t rinse off the Borax solution after scrubbing is done. Keep them stay so that they can prevent further upbringing of mold particles.
- Allow the surface to be completely air-dried.
Tea Tree Oil as the Mold Killer
Among all the natural mold killing elements, tea tree oil is the most effective one. It’s famous for its antiseptic properties. Before purchasing, check for labels tagged as “terpinen-4-ol and cineole”, as this chemical substance is responsible for mold removal. Follow the following steps:
- Make a solution with one teaspoon of the oil in 1 cup of water and pour the solution in a spray bottle.
- Spray on the moldy surface and then wipe it clean.
- Don’t rinse the surface. Just leave it to dry.
Tea tree oil solution is the best solution to clean your kitchen’s tricky areas like sink sprayer’s nozzles, faucet handles, sink caulk, spouts, etc.
Limitation
Tee tree oil has a strong smell. You may feel a problem with that. But the smell of the oil will eventually go away after some time of your cleaning procedure.
Mold remediation using grapefruit seed extract
Similar to tea tree oil, grapefruit seed extract is also a powerful natural substance that can work as a powerful mold killer. Unlike tea tree oil, this seed extract doesn’t produce any strong odd smell; instead, it works as deodorant against the musty mold odor. The removal process requires:
- Make a solution of 10 drops of seed extract oil per each cup of water.
- Spray on all possible mold surfaces.
- Don’t rinse. Leave them to be air-dried.
- For more visible and relatively persistent mold stain, keep the surface soaked up with the solution for almost an hour.
Grapefruit seed extract solution will remain for a long time. Keep the spray bottle and use the solution again and again in the mold removal process.
Keep it simple and use detergent water
If you don’t want to take any such hassles as mentioned earlier, then you have a simple and easy solution. Use detergent and warm water to form a solution. This solution can clean molds on both porous and non-porous surfaces of your kitchen. Scrub the region carefully and remove the molds growing on it.
How to prevent mold in Kitchen?
The mold removal process in the kitchen is a difficult task, no matter which procedure you do-follow. If you can prevent your kitchen from producing molds, you don’t need to take the hassle of it. There are some basic techniques to avoid your kitchen mold.
- The most obvious step to follow is keeping your kitchen dry. If there are any leaky pipes and roof, or any dysfunctional faucet or sprayer, repair it now. Check for leaks regularly.
- Keep your kitchen moisture-free. Maintain humidity in between the range of 40-50%. Install a dehumidifier in the kitchen if there isn’t any.
- Periodically inspect the heating and cooling systems of the kitchen.
- Keep the exhaust fan running while cooking in the kitchen.
- Try to keep the kitchen windows open for better air circulation and let the humid air go away.
- Use mold and mildew resistant paint on the kitchen wall, ceiling, and cabinet.
- Empty the compost bin daily so that no mold can form in there.
- Pour vinegar in the garbage disposal once a week.
- Wash the cupboard regularly using vinegar.
- Don’t use any carpet or rug on the kitchen floor. Try to install tiles or other hard surfaces.
- Keep your refrigerator clean always. Dispose of all old rotten foods.
- Check fruits and potatoes in your kitchen fridge always. Molds thrive most on there.
- Clean the sink regularly with an anti-bacterial cleanser. Use the cleaner on your countertops daily.
- Clean the refrigerator drip tray a couple of times in a year.
- You can use mold control spray like Concrobium.
Wrapping up
Mold can become a big issue. It can hamper your clean, healthy, hygienic lifestyle. The kitchen is the place of a house where everyone wants to keep clean and free from all debris and filth like mildew or mold. Your health issues are directly related to the hygiene of your kitchen. So, always keep your kitchen free from mold and always keep checking on it. Now, you know all about mold removal techniques. So, it won’t be a hassle at all, will it? Have a healthy kitchen, get a healthy life.