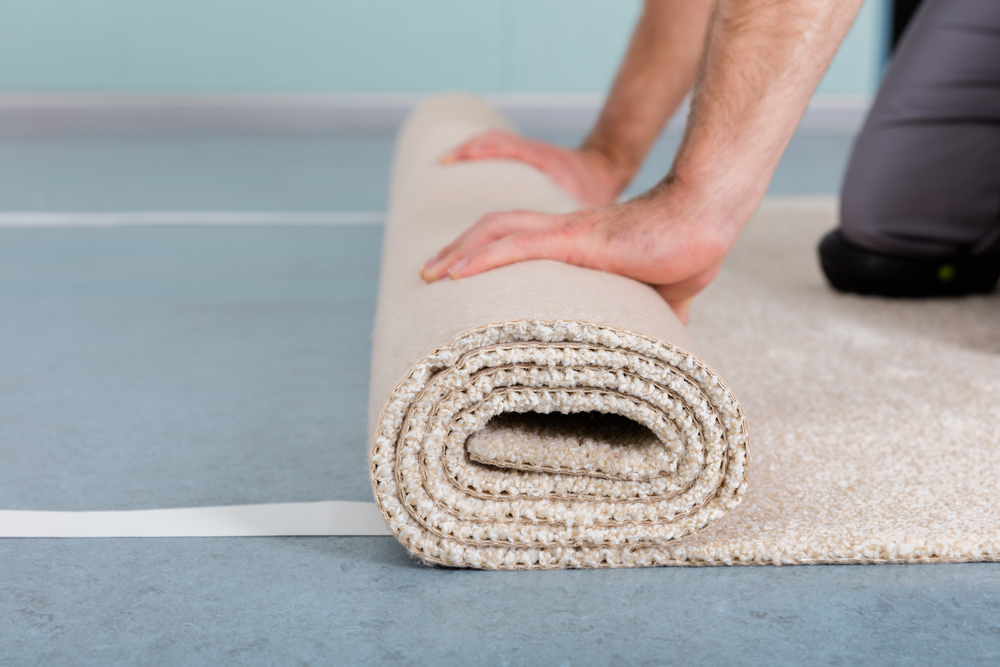
Are you looking for a way to install carpet without tack strips? Tack strips are the thin, metal pieces of plastic that are nailed along the edge of carpeting. If you don’t have tack strips on hand, this article will show you how to install your carpet without them!
Table of Contents
What Are Tack Strips?
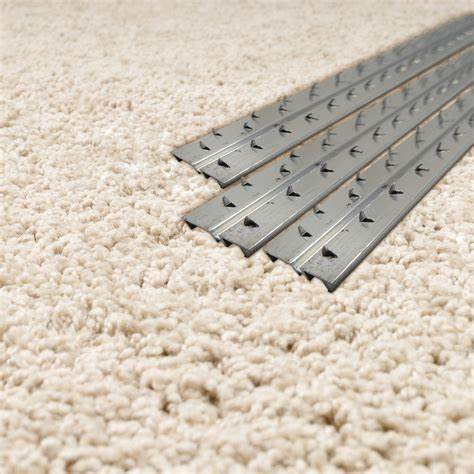
Tack strips are small pieces of thin plastic with holes punched through them. You put one strip at each corner of the room where you want to lay down carpet. Then you use an adhesive like hot glue to attach the rest of the strips around the perimeter of the area you’re covering. The result is a neat line of tacks holding everything together so there’s no chance for the edges of the carpet to fray.
Can You Install Carpet on Stairs Without Tack Strips?
Yes! It can be done but it requires some extra work. First, remove all your old flooring before laying new stuff down. If you have hardwood floors, then you’ll need to sand off the finish first. Next, cut out the stair treads in order to get rid of the risers. Finally, apply a layer of primer over the entire surface of the stairs. Once this dries completely, you can start applying the actual carpet. Make sure to follow the manufacturer’s instructions regarding how much padding should go between the steps. Also, remember to keep the riser height as close to the top step as possible.
Should You Install Carpet Without Using Tack Strips?
It depends on what kind of carpet you choose. Some people don’t mind having their carpet installed without any tacks. Others think that it makes sense to avoid using them since they might cause problems later on. In addition, many people feel more comfortable knowing that the carpet isn’t glued down by anything other than its own weight. However, others say that it would be better to stick with traditional methods. So, it really comes down to personal preference.
Also read,
10 Household Hacks To Save Time and Make More Efficient & Faster
How to Install Carpet Without Tack Strips
If you decide to do away with the tack strips altogether, here’s what you need to know:
Remove All Old Flooring Before Installing New Stuff Down There
First and foremost, make sure to take off whatever existing flooring you’ve got before installing new stuff. This includes tile, linoleum, vinyl, etc. Otherwise, you could end up damaging something underneath.
Next, measure the width of the staircase and add about 1/2 inch to both sides. Cut out the areas where the carpet will cover the risers. Use a utility knife to carefully trim the edge of the risers. Don’t worry too much about getting every last bit of material removed from the bottom of the risers; just try to get most of it. After doing this, clean the surfaces thoroughly with soap and water.
Now, let’s talk about the installation process itself. Start by cutting the carpet into sections according to the size of the space you’re working with.
Cut Out Risers and Apply Primer Over Entire Surface of Steps
Once you’ve finished cutting the carpet, apply a coat of primer onto the whole thing. Let dry completely.
Now, we come to the part where you actually begin attaching the carpet to the stairs. For starters, you’ll need four strips of wood per side of the staircase. These will serve as anchors for the carpet. They should be placed right next to the wall studs.
After placing the strips, position the carpet directly above them. Then, attach each piece of carpet individually using staples. The best way to do this is to staple one corner at a time. When stapling, make sure to pull the carpet tightly towards the center of the staircase.
After finishing the job, wait until everything has dried completely. Now, you can move around freely while waiting for the glue to set.
Lay Your Cushion Pad and Start Laying Down the Actual Carpets
The final step involves putting down the cushion pad. Lay down the cushions first. Then, lay down the rest of the carpets. Be careful not to overlap the edges of the carpet pieces.
When you’re satisfied with the look, give the area another coats of primer. Wait for it to dry completely. At this point, you can walk around freely again.
Use A Rubber Mallet or Something Similar to Keep Everything Together While Waiting for Drying Time
As mentioned earlier, there are two ways to go about keeping all of the parts together during drying time. You can either use rubber mallets or you can simply hold things together with your hands. Either method works fine. Just remember to keep moving around after applying the second coat of primer. It helps prevent mold growth.
In conclusion, whether or not you use tacks trips to install carpet on your staircases is entirely up to you! But, if you decide to skip them, then don’t forget to follow our tips here. We hope you found this article helpful!
Are Trackless Carpet Installations as Safe as Tack Strip Installations?
Tack strip installations have been used in homes since the early 1900s. In fact, they were originally designed to help people avoid slipping when walking across floors made of hardwood like oak or maple. However, these days, many homeowners prefer installing their own carpets because they think it looks better than hiring professionals. If you want to know more about how safe tacking is, read on below:
Alternatives to Using Tack Strips
If you’d rather not use tack strips, there are other options available. One option would be to use double sided tape instead. This type of adhesive doesn’t require any kind of preparation before being applied. Another alternative would be to use self-leveling flooring adhesives. These types of products work just like regular cement but they also contain an anti-slip agent. Finally, you could always opt for floating mats.
Carpet Tiles
Another popular choice among DIYers is carpet tiles. Unlike traditional carpet installation methods, tile installation requires no cutting whatsoever. Instead, you only need to cut out small squares from the backing material. After doing so, you place the square onto the subfloor. Once installed, you apply pressure by pressing down firmly. This causes the carpet to stick securely to the surface. Tile installation does take some practice though. So, if you’ve never tried it before, start off slowly.
Carpet Adhesive
Another way to make sure your staircase gets its new carpet is through using carpet adhesive. With this product, you’ll get rid of the hassle associated with laying down individual pieces of carpet one at a time. All you do is spread the adhesive over the entire area where you plan to put down the carpet. Next, wait until everything has dried thoroughly. Lastly, remove the excess adhesive and trim away any extra bits.
Tape
Finally, another great solution is to use duct tape. The best part about this particular product is that it’s easy to clean up afterwards. Simply peel back the sticky side and throw it into the trash bin. Then, wipe down the stairs as needed.
So, which method should you choose? Well, we recommend going with whichever option makes most sense for you. Remember, however, that none of these solutions will guarantee 100% protection against slips and falls.
Double-Sided Tape
The good news is that all three of these alternatives offer similar levels of security. They’re all pretty effective at keeping things stable. And, while each offers different benefits, they all come with pros and cons. For example, double-sided tape tends to be easier to handle and less messy compared to carpet tiles. On top of that, it comes with fewer risks of damaging surfaces. It’s also cheaper than either tile or adhesive. That said, double-sided tape isn’t perfect.
Staples
Staples tend to provide the strongest grip. But, they don’t look very nice. Plus, they leave marks behind after removal. Also, they aren’t recommended for use on concrete. In addition, they tend to rust over time. If you want something that looks nicer, feels better underfoot, and provides more stability, then go with staple-free carpet installation.
Magnetic Flooring
This type of flooring uses magnets to hold the carpet together. While it might seem complicated, installing magnetic floors actually takes quite a bit of effort. First, you must prepare the subfloor properly. You’ll need to scrape away any loose dirt and debris. Then, you’ll need to lay down a layer of sandpaper. Afterwards, you’ll cover the whole thing with a protective coating. When done correctly, the result is a smooth, even surface that won’t attract dust particles.